#7: Creating an Image Mosaic in Python
MicroProject Overview
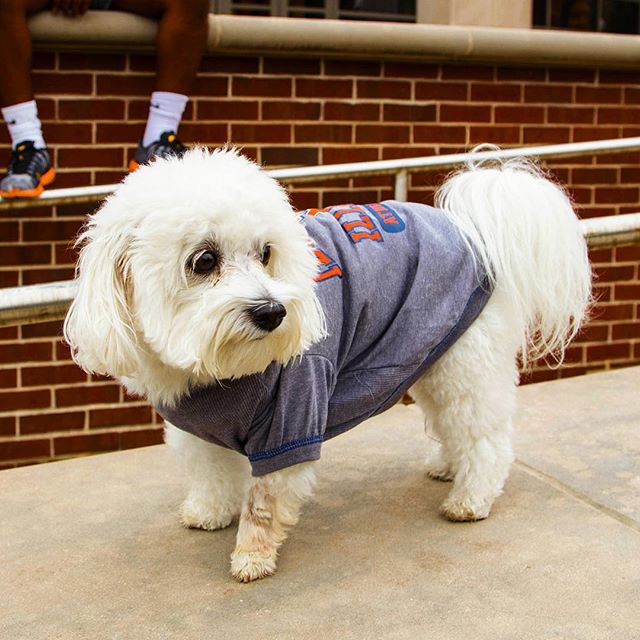
A Data Science DISCOVERY alumni had their puppy, Rosie, featured on the official University of Illinois instagram and we thought "what if we could make an image of Rosie made entirely out of only images posted of UIUC's instagram?"
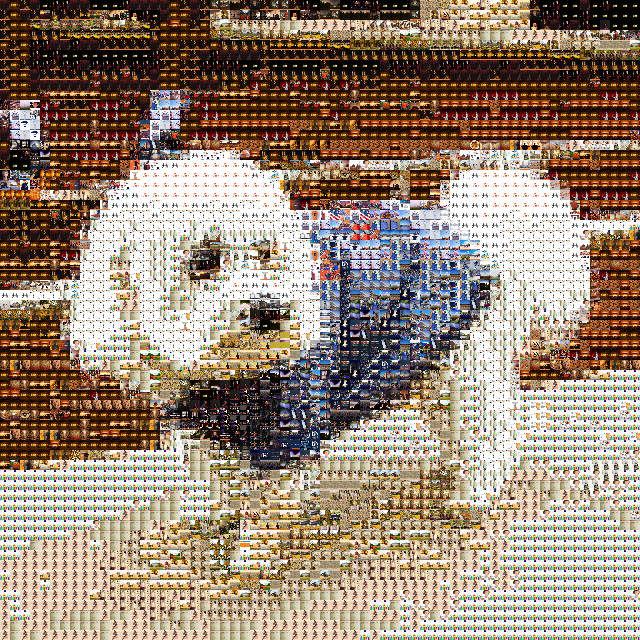
By dividing the image up into a square grid, and replacing each grid with an image from the UIUC's instagram, we created an image mosaic of Rosie:
 →
→ 
To fully see the mosaic is made up of only other images, the following set of images are increasingly zoomed into the mosaic to show increasing levels of detail:
|  | 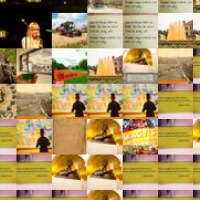 | 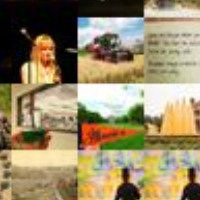 |
| The "Rosie Mosaic", made entirely of images from @illinois1867 | 5x Zoom (the top-left of the zoomed region is Rosie's nose) | 25x Zoom | 50x Zoom |
In this MicroProject, you will create your own personal mosaic using the images of your choice! You will work with processing image files into DataFrames and then using your skills with DataFrames to create your mosaic.
Mosaic Terminology
Throughout this MicroProject, there are two important terms for you to understand.
The base image is the image that you will be making into a mosaic. In our example, the base image was the picture of Rosie. You will choose your own image.
The tile images are the images that you will being using as tiles of your mosaic. In our example, the tile images was the pictures posted of UIUC's Instagram.
- We strongly recommend you use your own tile images -- it is much more fun to make something uniquely you! You can use your images from your iCloud / Google Images, an "Image Search" on Google, or any set of images you have!
- If you are completely stuck, we have provided all the tile images we used form @illinois1867 to create Rosie Mosaic shown above.
Additional Python Libraries
To complete this MicroProject, you will need to install the pillow and pillow-heif Python libraries to access the image pixel data and convert that data into a DataFrame. To install these libraries, run the following command in your terminal:
python3 -m pip install pillow pillow-heif nbformatFirst Time Doing a MicroProject?
Each MicroProject starts with a notebook that we provide to you to get started! You will need to configure a git repository to connect to our `microprojects` remote where we release the starter notebook.
- Follow our Guide: "First Time Setup for MicroProjects" to get set up!
Fetch the Initial Files
In your terminal, navigate to your GitHub repository and merge the initial files by running the following commands:
git fetch microprojects
git merge microprojects/microproject-07-creating-an-image-mosaic --allow-unrelated-histories -m "Merging initial files"
Complete the Notebook
If the commands above were successful, you have merged in the initial files to start on the MicroProject.
- Find the new
microproject-07-creating-an-image-mosaicfolder. - Open
microproject-07-creating-an-image-mosaic.ipynband complete the MicroProject!
Commit and Grade Your Notebook
Once you have finished your notebook, you must use the built-in GitHub Action to preform automated grading of your MicroProject notebook! You will need to commit your work and then manually run the GitHub Action.
Commit Your Work
To commit your notebook, run the standard git commands in your terminal:
git add -u
git commit -m "microproject completed"
git push
Grade Your Notebook
To grade your notebook, you will need to visit your GitHub repository in your browser.
- Visit your GitHub repository in your browser
- Click on the "Actions" tab
- Under "Workflows", find the workflow for this microproject
- Click the "Run Workflow" in the blue box, and then the green "Run Workflow"
- After about 10 seconds, you should see a new job that has started running
- You can click on the job to watch it run in real-time
- It will take ~1 minute to run and grade
- Once the running is complete, the autograding summary will be available!